| Instructions
for VX4400
PLEASE
Backup your phone before making any modifications to it!!!
I cannot be responsible for anything that happens to your phone
while using this software
For
troubleshooting tips, please refer to the main page troubleshooting
link.
Driver setup etc. is for the straight through USB cable,
not for the serial converted one. If you have the cable with the blob
in the middle, use the lgdrivers.exe and you will see the cable set
up as a com port in Device Manger.
Installing
the Drivers - Straight through USB Cable:
- Purchase a USB cable if
you haven't already. Get one (and other cool stuff) here from eCity
Wireless.
- Before you plug in your
USB Cable to your PC, you need to install the USB Drivers.
- Run the setup.exe
in the Alternate Drivers folder of the Super CD, select the LG 4400
from the list.
- If you have trouble with
the previous driver, uninstall it and...
- Run the lgdrivers.exe
in the root directory of the Super CD.
- Finish the driver installation
and connect the cable to your computer and phone.
- Windows will recognize
the device and add it as a modem in Device Manager.
Installing
the Drivers - Prolific Cable (blob in the middle of cable):
- Purchase a USB cable if
you haven't already. Get one (and other cool stuff) here from eCity
Wireless.
- Before you plug in your
USB Cable to your PC, you need to install the USB Drivers.
- Run the PL-2303
Driver Installer.exe in the root directory of the Super CD.
- If you have trouble with
the previous driver, there are several other versions on the disk.
- Finish the driver installation
and connect the cable to your computer (do not connect the phone).
- Windows will recognize
the cable as a device and add it as a Com Port in Device Manager.
- Verify which Com Port
this is set to.
Determining
the Port - Straight through USB Cable:
Many people that request
support for this always skip this step. For any program to talk to your
phone, the program will need to know what COM Port is assignned to the
phone device in Device Manager. Example is for Win XP.
- Right Click your My Computer
Icon, select Manage
- Click on Device Manager
on the left
- On the right, click the
+ sign next to modems (you should see your phone listed there)
- Right click on your phone
and select properties
- Click advanced
- Click Advanced Port Settings
- You will see the COM Port
setting at the bottom (write it down, you will need it later)
BITPIM:
Please Backup your
phone!
- Load BitPim
- Go
to Edit -> Settings -> and point your COM to the COM Port your
LG 5450 is attached to.
- Click on Filesystems
tab, then click on + (as one would do in Windows Explorer)
Removing
the VZW Banner:
The banner
on your phone is a file that has been encoded in the file system. In
order to remove it, we have to find the file, manipulate it using a
hex-editor and overwrite the original file with our newly hexed one.
Install winhexsetup.exe
off of your cd. Download and get it running. Now
we have to go in to the filesystem of the phone and retrieve the file.
Retrieving
the file:
- Connect you phone and
open bitpim
- Select view from the topmost
tool bar and click view filesystem. This opens a new tab called "Filesystem
- Click on the tab. there
is a blank screen except for one expandable + -
- Expand it and bitpim
should say "retrieving"
- After it has retrieved
the file system, look for another expandable file called "eri"
- Expand it, which brings
eri.bin in to play. That is the file we are going to edit using winhex.
- Right click and hit save
- Save it in a "bitpim
saves" folder or just remember where you put it.
We are done with bitpim for now. Minimize it, or close out completely.
Now we have to edit it..
change it around, manipulate it. This step needs to be paid very close
attention to.
Editing
the file:
- First you want to locate
the file you saved from bitpim
- Right click it and copy
it
- Paste it in the same
place and name it "hexable" or "tobehexed"
This way you have a clean copy in case you mess up
- After you have a copy,
open winhex, look under file and select "open"
- Find your "hexable"
or "tobehexed" file.
- Ignore the code and look
to the right of it. You will see:
Ab....... ...0..
@...Verizon Wire
lessA...Verizon
WirelessB...Exte
etc., etc.
- Place your cursor over
the first V in the first Verizon Wireless.
You should see a blue blinking box and a white V under it
- Hit the space bar one
by one by one until both words of the first set "Verizon Wireless"
are gone.
Do not erase the A or the "..."
- It should look like this:
Ab....... ...0..
@...
A...Verizon
WirelessB...Exte
etc., etc.
- Do the same for the next
set, careful not to erase the B or the "..."
- Go under file and select
"save as.."
- Save the file as "erihexed"
or "hexed"
You are done with winhex, close out completely.
Now, simple, take your newly
hexed file and overwite your eri.bin file that is currently on your
phone.
Overwriting
the file:
- Open bitpim, and as before
retrieve the filesystem
- Expand the eri file as
before
- Right click on the eri.bin
file and select overwrite
- Find your "erihexed"
or "hexed" file and select open Bitpim should say "writing"
or "busy".
- After it's finished,
go up to "file" and then "exit".
So you open the phone and
see that it's still there. Reboot after making ANY changes to the filesystem,
whether it's adding wallpapers, ringers, games or changing your banner.
So powercycle the phone by turning it off and then back on. Your banner
should be gone and you should be very very happy.
Adding
Ringtones:
- Find a ringtone or midi
file ending in .mid on the cd.
- Copy and paste it to
your system under the subfolder "ringers" in the "bitpim"
folder
- Run bitpim
- Select "data"
from the topmost toolbar
- Select "send phone
data"
- A pop-up will appear
asking what data you want to send to the phone
- Well, for this we will
select "ringtones" by clicking the box to the left of it
- Select "add/merge"
to add the current files to your phone
Selecting "add/merge"
adds the files without overwriting what you presently have on the
phone. If you select "replace/overwrite" all of the files
you are about to load will overwrite what you currently have on the
phone. It is always recommended to "add/merge" your files.
- Bitpim will say "busy"
and a status bar will run at the bottom showing the current files
being loaded.
- Save and quit
- Powercycle your phone
to get the files to show up
If you check your ringers
for new additions like this:
- Select menu
- Settings (8)
- Sounds (1)
- Caller ID (1)
There's your list, find your
newly added ringers.
Adding
Wallpapers:
First we need to get it into
bitpim, like this:
- Find the pictures on
the cd that you want to put on your phone.
- Change the name if it
has CAPITAL letters to lowercase. Keep it short
- Make sure the file is
saved as a .bmp, .jpg or .png file as these are the accepted formats
for images on the phone Note: Bitpim converts all formats into
.bmp
- Save it directly to the
"wallpaper" folder under "bitpim" This way it
will be there when you go to launch bitpim
- Hook up your phone
- Run bitpim
- Click on your "wallpaper"
tab to ensure that the image is there
- Select "data"
from the topmost toolbar
- Select "send phone
data" A pop-up box appears with several options to send.
- Select "wallpaper"
by clicking the box to the left of it.
- Select "add/merge"
to add the current files to your phone.
Note: Selecting "add/merge" adds the files without
overwriting what you presently have on the phone. If you select "replace/overwrite"
all of the files you are about to load will overwrite what you currently
have on the phone. It is always recommended to "add" your
files.
- Bitpim will say "busy"
and a status bar will run at the bottom showing the current files
being loaded.
- Powercycle your phone
to get the files to show up.
To check
if the wallpaper is there, we have to search in our wallpaper list,
like this:
- Select menu
- Settings(8)
- Display(2)
- Screens(3)
- Wallpaper(1)
Note: If all you see is your default paper, hit soft key two
for "more" and select "downloaded".
- Press right or left to
view wallpaper
Get
Free Games and Apps:
How
do I make a demo game unlimited?
- Go through
GIN and find a game/application with a demo.
- Download
the game to your phone.
- Either
play it or don't.
Note: Some people have different views regarding this step.
Some say to let the game expire. I say it doesn't matter due to the
fact that you are altering the file. Wether you do it before or after
it expires doesn't matter, in my opinion.
- Download
the edited file, save it in a new folder called "games".
Jot down its number on a piece of paper.
- Open
bitpim, retrieve the filesystem and expand the brew folder.
- Locate
the file by its number.
Note: Each game/app has two components. The first is the actual
game file which includes game data, graphics, levels, and codes. The
second is the .mif file that details your subscription/purchase of
the game. This is the file we want to manipulate.
- Right-click
it and select "overwrite".
- Locate
the edited .mif file of the game or program you want to make unlimited.
- You will
see "busy" or "writing to brew" at the bottom
of the bitpim screen.
- Powercycle
your phone, and check through GIN, under options, to see if you are
successful.
How do I get a game if I don't have
a demo?
- Download
the edited file, save it in a folder you create called "games".
Jot down its number on a piece of paper.
- Open
bitpim, retrieve the filesystem and expand the brew folder.
- Right
click on the word "brew".
- Select
"new file..".
- Find
file you want to add in your "games folder.
- You will
see "busy" or "writing to brew" at the bottom
of the bitpim screen.
- Powercycle
your phone.
- Press
down on your four way key to access GIN.
Note: You should see a game or app graphic/picture there. If
not, you messed up. Try again.
- Select
the new file.
Note: You will get a white screen with text telling you that
this application was disabled to save space. It then says to re-enable
press ok.
- Press
OK to begin downloading the file.
Note: It should immediately begin downloading. If it loops
the "white screen" then it is a bad file or you have done
something wrong! Try again.
- After
download is complete, enjoy!
How
do I edit my own files?
Normally
only done on demos to make them unlimited, a hex editor is used to modify
the file and make the phone think it is unlimited.
- Download
a game demo.
- Hook
your phone up to your cable.
- Run bitpim,
view the fiesystem and expand the brew file.
- Right
click on the .mif file that you want to manipulate and select "save...".
- Create
a copy in whichever folder you saved it to. Don't rename the files.
Just have two copies.
- Run winhex,
clicking on file, select "open" and find one of your copies.
- Woah!
Lots of code. Scroll all the way down to the bottom. This will be
our area of concentration.
- Starting
at the end, you will see groups of two, like 00, 31, 66, etc. Each
one of those pairs is considered a byte.
- Count
back 16 bytes(pairs) and change the code to 02 03 FF FF FF FF. This
makes the file unlimited.
- Save
the file (DON'T change the file name!) in a different place than the
other copy so you do not confuse them.
- Open
bitpim again, expand the filesystem, expand brew folder, select the
.mif you want to overwrite, right click it choosing"overwrite",
and find the file you edited. Open it and save.
- Powercycle
your phone and check your work
How
do I know it worked?
- Select
down on your four way key(GIN).
- Select
the shopping cart.
- Go to
options.
- Find
app/game you edited.
- Select
it.
You will see:
The name of the game.
Who makes it.
Subscription time left.
App size(which includes graphics, levels, etc.).
Data size(which can include where you last left off, or high scores).
- Your
focus is on the subscription time left.
Hopefully it is unlimited!
Free
WAP:
Remember, when browsing
you still use your plan's minutes -- Think about browsing nights and
weekends, or whenever you have unlimited minutes.
What
is the process?
To get free
access you have to do the following:
- Enter the vx4400's hidden
menu
- Set a new IP and port
- Route your browser through
the new settings by setting a new proxy
- Enter your own homepage
How
do I enter the service menu?
- Hit menu.
- Then
0. You'll be asked for a service code.
- Enter
000000.
Welcome to the vx4400's hidden menu.
What
are we doing in the menu?
We are changing
the IP and Port settings so you can access free WAP.
"WAP" stands for
"wireless application protocol," and it's the way your phone
communicates with the internet. Two settings need to be changed to have
free WAP on your phone, IP settings and port setting.
How
do I change my IP?
- From
the services menu, select WAP settings (9)
- Select
IP settings (1)
Note: There are nine choices here: three for "link 1,"
three for "link 2," and three for "link 3."
Link 1 is the verizon settings, so we'll leave that alone.
- Select
link 2-IP 1(4)
- Enter
207.232.099.109
Note: To add periods, use soft key 2 to switch between entry
menus.
This is the IP address of WAPTunnel.com's free gateway
- You can
also do this for link2-IP 2
- Select
ok, then select clear to get out of the IP Setting menu.
How
do I change my port?
- From the
services menu, select WAP settings (9)
- Select
port settings(2)
- Select
link 2-port 1 (4)
- Enter
9201, then hit ok.
- You can
also do this for link 2-port 2.
- Select
end to get back to your phone's main screen
How
do I configure my browser?
- Start
your browser by either hitting menu then 4 or by hitting right on
your four way key.
You might get an error. Don't worry.
- Hold
down 0 to bring up the browser menu.
- Select
"advanced"(6)
- Select
"set WAP proxy" and set it for "WAP proxy 2."
Then select ok.
You may be prompted for a home page.
- Enter
http://tagtag.com/aflux or http://www.google.com/wml.
Both are good start pages for browsing on your phone.
- If you
aren't prompted for a home page, your best bet it to hit "end"
to get to the main menu then start your browser again, hold 0 to get
to the browser menu, then hit "homepage" (2) to set it.
Wireless
Internet using your phone:
How
do I set it up for a desktop or laptop using the moblie office software?
- Go in to your Device Manager
(Win2k- Right click on My Computer-->Properties-->Hardware-->Device
Manager).
- Click on the + by "Ports"
and look for one that has LG or USB in the name. Record that port
number for use with BitPim.
- Go to the menu on your
vx4400.
- Choose Settings and Data
Settings(menu ==>8 ==> 6).
- Go to Select Port and
choose USB and save.
Note: If you are using a serial cable, choose RS-232C(Com Port).
- Now go to Port Speed and
choose 115200 and save.
- Run the QuickLink Mobile
.exe file (QLMobile.exe) to 'unzip' the program.
- Find and run the program
START.EXE. Follow instructions on the screen and be sure to select
the appropriate port/cable type (USB for the futuredial cables).
Note: The screen where you put your mobile number for ExpressNet
can take a VERY long time to process. DON'T hit the next button a
second time.
- When the following screen
comes up it asks if you want to make wireless copies of any current
dialup account, SAY NO.
- The Software should now
have found your phone and installed Quicklink Office and Venturi Software.
- Now get the Venturi_Express.exe
or Venturi_CPCD.exe upgrade software and install it.
IMPORTANT: restart your computer. You don't need to remove
the phone but you can just to be safe.
- When the Computer is back
on, click on the QuickLink Mobile Icon and choose ExpressNet (after
you've got it enabled through VZW) and connect.
How
do I set it up for a desktop or laptop IF I'M NOT using the moblie office
software?
Note:
Follow the above steps through step#5.
- Plug your cable into your
phone and into the computer.
- Go to Control Panel-->
Network and Dialup Connections and start the wizard for Make a New
Connection. Choose the Dial Up to the Internet Option.
- Select Manual Setup, then
Connect through a phone line and modem. You can try to have Windows
find your modem or select it manually. Either way you should select
the Verizon Wireless Phone (1xRTT) modem.
- Install the modem on the
port you located in step #4. Click Finish.
- For the number dialed
by the modem put in #777
Note: Get rid of the area code if it's there.
- Your user name is @vzw3G.com
and your password is vzw (these ARE case sensitive).
- Name the connection whatever
makes your wheels roll.
- Say NO to setting up an
internet mail account (unless you WANT an MSN mail account) and finish.
Note:You will most likely have to reboot for everything to
work.
Can
I connect a Palm OS device? how?
What you'll
need:
- A handheld (I use Handspring).
- A cable to connect it
to the phone.
Note:These are available from
thesupplynet.com at about $40.
Note again: If you are using a Palm device with an RS232 connection
to the computer (your sync cable)
you can use a null modem adapter and the LG KW-a serial cable.
Setting
up and getting connected:
- On your device go to Prefs->Connection
and make a new connection (I called it VEN)
- Click edit
- Connection should be Seial
to PC
- Click details
- Speed should be 115,200
and flow control should be automatic
Note: If you have a Handspring... then flow control is OFF
- OK->OK
- Go to Network
- Create a new network (I
called it VEN)
- Username is 10digitphone#@vzw3G.com
- Password is vzw
- Connection is VEN (or
whatever you named it earlier)
- Click details
- Click script
- Select Send from the "end"
pulldown
- Type AT$QCMDR=3
Note: This is CASE SENSITIVE
- Then select Send CR
- Then Select Send
- Type ATDT#777
Note:This is CASE SENSITIVE
- Select Send CR
- Select Delay
- Type CONNECT
The
script should look like this:
Send: AT$QCMDR=3
Send CR:
Send: ATDT#777
Send CR:
Delay: CONNECT
END:
What
if I am using QNC on my Palm?
The above
is good except for the Username & Password (qnc, qnc) and the script
calls for a 2 instead of a 3 in the first line. Note: Check line
15 You need to install a browser on you palm Blazer
is good and costs $20. EudoraWeb
is free but won't display graphics). Launch the browser and the connection
should go active.... Happy Surfing.
What
if I want to connect a PocketPC to Express Network?
PPCtoEN.pdf on the cd for
help.
|
Get more great deals
from
eCity Wireless
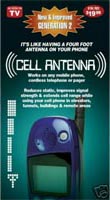
Antenna Booster
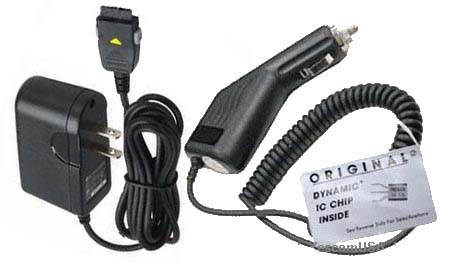
Car and home
chargers
Bluetooth
Devices
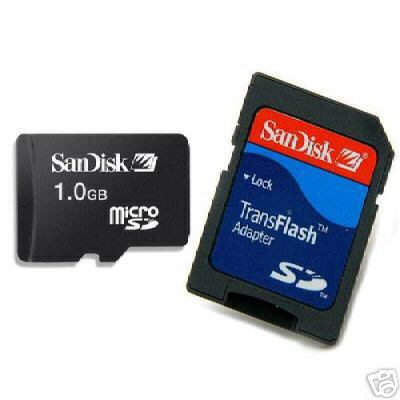
Memory
Cards
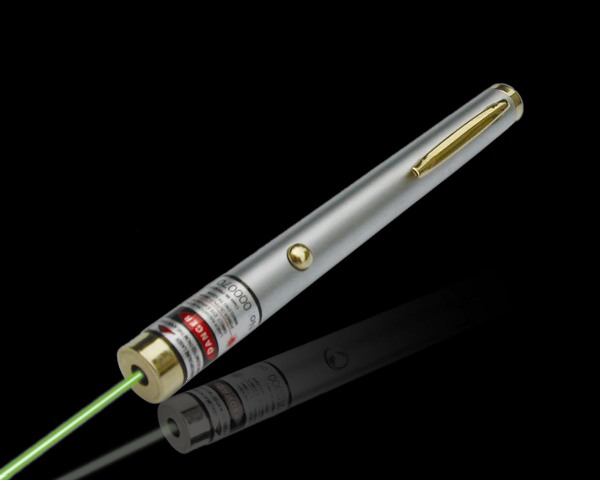
POWERFUL
Green Laser Pointer see the beam not just the dot at the end!
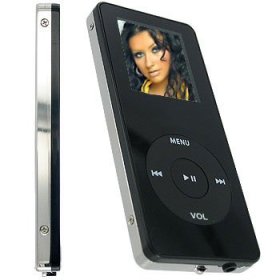
MP3/MP4
Players with FM, Games, video, etc.

Accessories
for your Harley
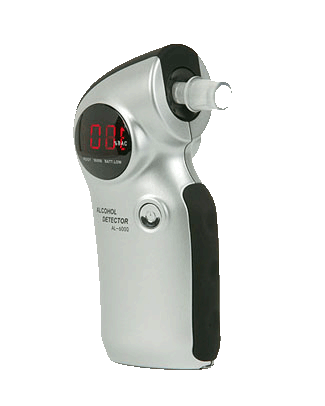
Digital
Breathalyzers
|


